

Visual storytelling for deep learning training runs.



See what your model is actually doing — training logs become a plain-English story with a letter grade, live in VS Code.
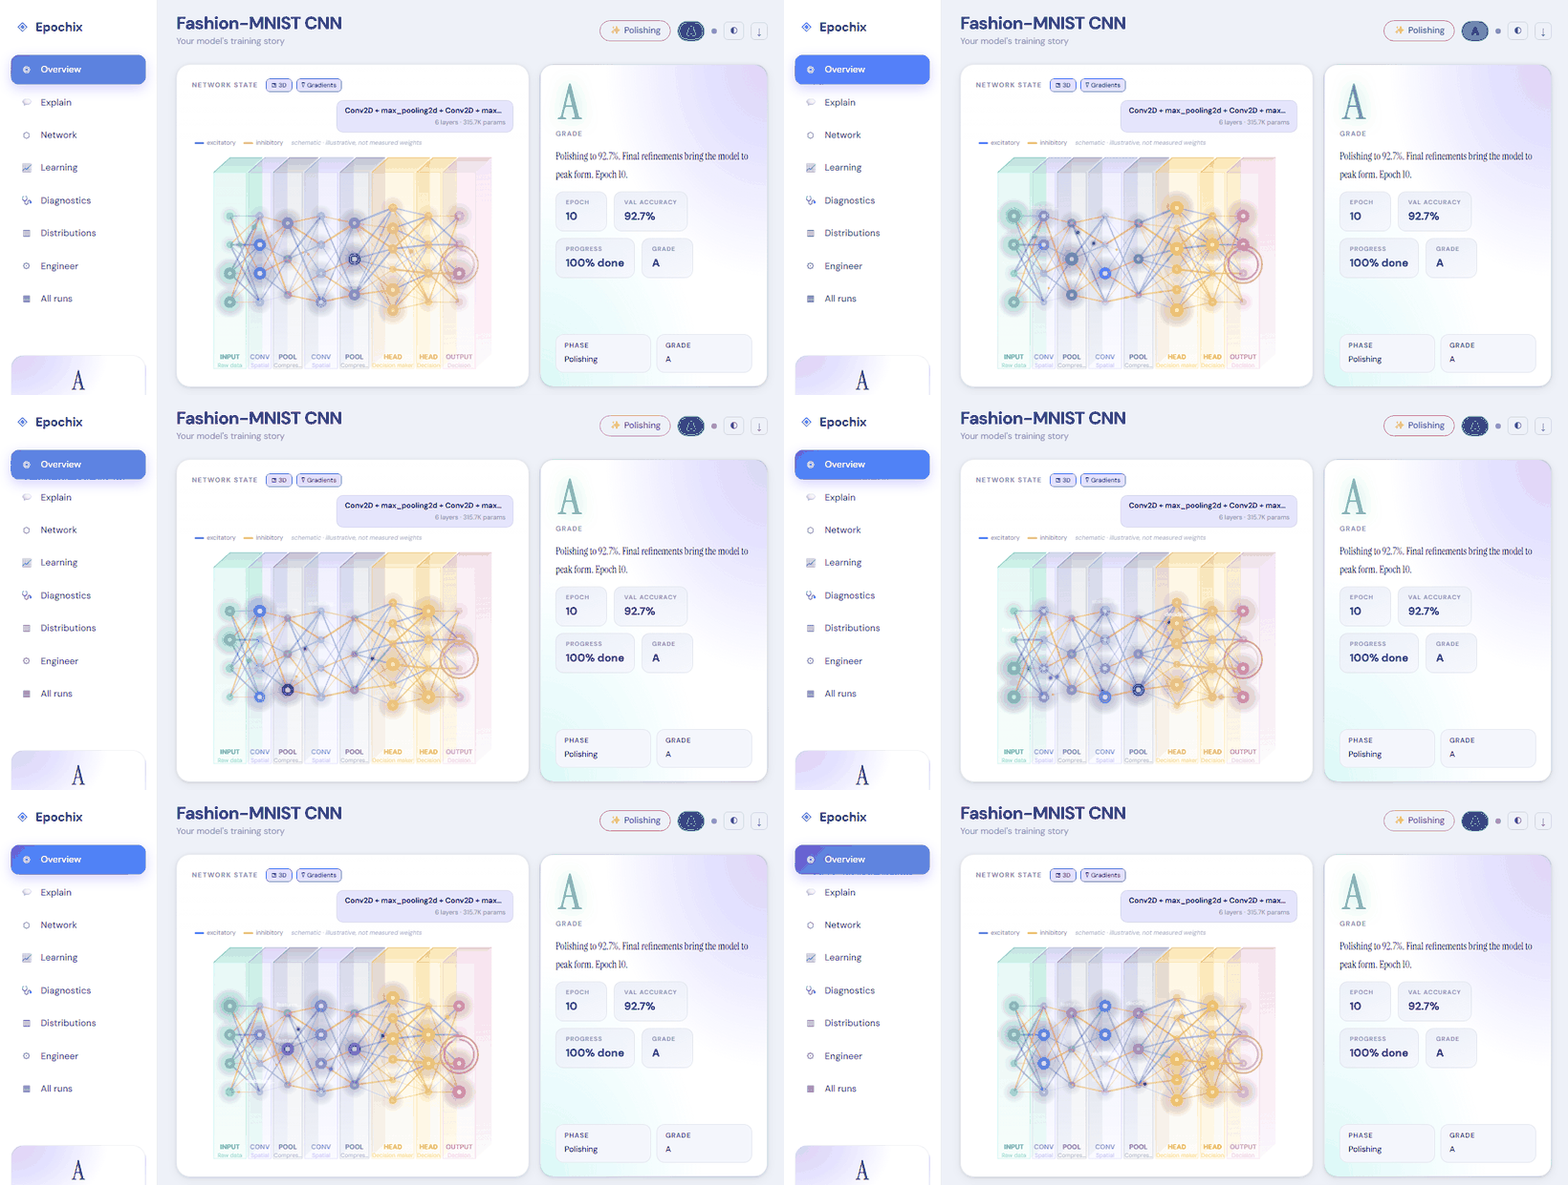
No code changes — it reads your training output as-is. This is the bundled
Keras demo (epochix demo keras) — a CNN trained with Keras on scikit-learn's
handwritten digits by
demo/keras_image_classifier_source.py
— its last epoch, as Keras printed it, and what Epochix says about it:
Epoch 20/20
43/43 ━━━━━━━━━━━━━━━━━━━━ 0s 5ms/step - accuracy: 0.9666 - loss: 0.1600 - val_accuracy: 0.9578 - val_loss: 0.1658
↓
⚡ Mastering phase — Grade A+

Mastering: accuracy 95.8% at epoch 20 — three quarters of the way to a perfect score, or more.
Still improving at the last reading — the grade shows where the run got to, not where it was heading.
The sentence is one of several phrasings for this phase, so yours may be worded differently; the phase, the grade and every number come from the log.
Not comfortable with terminals? Install the Epochix extension, click the E icon in the sidebar, and hit ▶ Try a Demo Run — an animated dashboard opens on a bundled training run. No Python, no data, nothing to configure.
From there it's automatic: run your training script in the integrated terminal
and the dashboard opens by itself when Epochix recognises training output
(Keras, PyTorch Lightning, YOLO, HuggingFace, fastai, or plain key=value
logs). A Get Started walkthrough inside the extension covers the rest.
Installing the Python package below is optional — it adds run history, run comparison and exports, and the extension picks it up automatically.
pip install epochixThat is the whole install — every export format (HTML, PDF, Markdown, JSON, animated GIF) works from it, with no extras.
Optional extras exist only for the training-framework callbacks:
pip install "epochix[lightning]" # PyTorch Lightning callback
pip install "epochix[hf]"        # HuggingFace Trainer callback
pip install "epochix[all]" # both of the aboveepochix demo # seq2seq + attention, PyTorch Lightning
epochix demo yolov8 # YOLOv8n object detection, Ultralytics
epochix demo keras # Keras image classifierEach demo is the recorded console output of a real training run; the script
that produced it sits beside the log in
demo/.
python train.py 2>&1 | epochix --liveepochix training.log # any subcommand can be omitted — it's the defaultXGBoost, LightGBM and CatBoost are read round by round, with the training and validation curves kept apart — the gap between them is the overfitting signal:
python train_xgb.py 2>&1 | epochix --live[0] validation_0-logloss:0.51987 validation_1-logloss:0.52369
[1] validation_0-logloss:0.40326 validation_1-logloss:0.41045
[2] validation_0-logloss:0.32871 validation_1-logloss:0.34102
[3] validation_0-logloss:0.27544 validation_1-logloss:0.29870
[4] validation_0-logloss:0.23610 validation_1-logloss:0.27411
[5] validation_0-logloss:0.20412 validation_1-logloss:0.26350
[6] validation_0-logloss:0.17905 validation_1-logloss:0.26112
[7] validation_0-logloss:0.15833 validation_1-logloss:0.26498
[8] validation_0-logloss:0.14002 validation_1-logloss:0.27204
[9] validation_0-logloss:0.12455 validation_1-logloss:0.28033
↓
Past its best: 0.2611 at epoch 6, now 0.2803. The later epochs are not improving on it. Next step: keep the checkpoint from epoch 6 if one was saved, and use early stopping on this metric so the next run ends there.
scikit-learn works too. A loop printing whatever you already print is enough —
no delimiter required, and the estimator's own repr() is not mistaken for
results:
iter 18 rmse 12.2614 r2 0.9960
Train accuracy: 1.0000
Test accuracy: 0.9820
Train and test are kept as separate series, so two measurements of two different sets are never drawn as one declining line.
Training on a GPU box / cluster node, dashboard on your laptop:
# Direct: tail any remote log into the local dashboard
epochix --ssh kv@trainbox:/workspace/runs/train.log

# With extras (jump host, custom port, key)
epochix --ssh kv@trainbox:/workspace/train.log \
            --ssh-port 2222 \
            --ssh-identity ~/.ssh/id_ed25519 \
            --ssh-opt ProxyJump=bastion.example.com
We spawn ssh -o BatchMode=yes -o ServerAliveInterval=30 <host> 'tail -F …'
under the hood — your credentials, ~/.ssh/config, agent and keys are
inherited automatically. The remote path is shell-quoted before being sent so
exotic filenames are safe. Connection drops surface as a clear error rather
than hanging.
The classic Unix pipe still works too if you prefer:
ssh trainbox 'tail -F /workspace/runs/train.log' | epochix --liveepochix serve
# → opens http://127.0.0.1:7860 in your browserParse a finished log:
from epochix import parse

run = parse("training.log")
print(run.final_grade.value, run.story_summary)
Stream live during training (PyTorch Lightning):
import lightning as pl
from epochix.integrations.lightning import StoryCallback

trainer = pl.Trainer(callbacks=[StoryCallback()])| 8 log parsers | PyTorch Lightning · Keras/TF · HuggingFace · YOLO · FastAI · Accelerate · Gradient boosting (XGBoost/LightGBM/CatBoost) · Universal — plus an opt-in LLM fallback (Ollama/OpenAI) for formats none of them recognise |
| 8 task types | Classification · Detection · Segmentation · Regression · Biometric · Gaze · NLP · Generative |
| 5 training phases | Awakening → Learning → Understanding → Mastering → Polishing |
| 11 letter grades | A+ through F, task-specific thresholds, configurable via .epochix.yaml |
| Live streaming | WebSocket + SSE with ring-buffer replay on reconnect |
| Exports | JSON · Markdown · HTML (self-contained < 2 MB) · PDF · animated GIF |
| i18n | English · Farsi (RTL) · French — UI and story narratives |
| VS Code | Activity-bar panel · one-click demo · terminal auto-detect · run compare · Ctrl+Alt+M |
| Integrations | PyTorch Lightning · HuggingFace · Keras · Jupyter magics · TensorBoard · W&B |
| Plugin system | Custom parsers, metaphor packs, task types, exporters via entry_points |
Keep them. Epochix answers a different question.
A tracker records what happened across many runs so you can compare them later. Epochix reads one run and tells you what it means — where the model peaked, whether it is overfitting, which epoch was actually best, and a grade with its reasoning attached.
| Experiment tracker | Epochix | |
|---|---|---|
| Setup | Add wandb.init() / wandb.log() to your code |
Nothing — it reads what you already print |
| Account | Required | None. Runs locally, uploads nothing |
| Works on someone else's log | No — no SDK call, no data | Yes, including logs from months ago |
| Answers | "What were the numbers?" | "What do the numbers mean?" |
| Sweeps, registry, team dashboards | Yes | No, and deliberately so |
Point it at runs you already have:
epochix import-tensorboard runs/experiment_1Or the W&B runs already sitting on your disk — also no account, no network:
epochix import-wandb wandb/Pass entity/project/run_id instead of a path and it fetches from the W&B API,
which does need a key. Both W&B forms need pip install wandb.
Full detail: Coming from W&B / TensorBoard
Nothing in epochix talks to a GPU vendor API. Reading a log needs no accelerator at all, and live activation capture — the per-layer activity in the Network State panel — uses PyTorch and Keras forward hooks, which are framework APIs, not CUDA ones. There is no device check anywhere in the SDK.
So it should work the same on Apple Silicon (MPS) and AMD (ROCm) as it does on NVIDIA. "Should" is doing real work in that sentence: we have run it on CUDA and CPU and nowhere else, and an untested path is not a supported one.
epochix doctor runs the real capturer on whatever device you have and prints
what came back:
torch          2.11.0+cu128
accelerator    cuda  NVIDIA GeForce RTX 5080 Laptop GPU
activations    working (2 of 2 layers captured)
If you are on an M-series Mac or an AMD card, that output is the single most useful thing you can send us — working or broken, it settles the question. Paste it into an issue: https://github.com/Epochix-dev/epochix/issues/new
epochix is secure-by-default:
- the server binds to
127.0.0.1(loopback only), - read endpoints are open to any same-origin page on your machine,
- write/delete endpoints require either a Bearer token or a same-machine (loopback) caller — so a malicious tab on another site cannot delete runs or inject metric events,
- CORS is same-origin only (no
Access-Control-Allow-Originis emitted unless you configureEPOCHIX_CORS_ORIGINS), - the OpenAPI / Swagger UI is hidden unless
EPOCHIX_EXPOSE_DOCS=1is set or an auth token is configured.
To expose the server beyond your own machine (a shared box, a container, the internet), turn on authentication and configure the allowed origins:
# Require a token on every request, and only allow your own origin
export EPOCHIX_AUTH_TOKEN="$(openssl rand -hex 24)"
export EPOCHIX_CORS_ORIGINS="https://story.example.com"
epochix serve --host 0.0.0.0 --port 7860| Setting | Env var | Default | Effect |
|---|---|---|---|
| Auth token | EPOCHIX_AUTH_TOKEN |
(empty) | Require a token on all routes; write/delete also accept loopback callers when this is empty |
| CORS origins | EPOCHIX_CORS_ORIGINS |
(empty — same-origin only) | Comma-separated allowlist (use the explicit * to opt into open CORS) |
| Expose API docs | EPOCHIX_EXPOSE_DOCS |
false |
Show /api/docs, /api/redoc, /api/openapi.json (auto-on when an auth token is set) |
How the token is checked:
- REST (
/api/*): sendAuthorization: Bearer <token>. - WebSocket / SSE (
/ws/live/...,/sse/live/...): pass?token=<token>in the URL (browsers can't set headers on those transports). Without it, live streams are refused.
Note: wildcard CORS (
*) and credentialed requests are never combined — credentials are enabled only when you set explicit origins. And when a token is configured, the bundled dashboard has no way to supply it, so live updates won't load from the served page. For authenticated hosting, put epochix behind a reverse proxy (nginx, Caddy, Cloudflare Access, …) that handles auth and serves the UI.
Settings can also be written to a local .env:
epochix config set auth_token "$(openssl rand -hex 24)"
epochix config showPut a .epochix.yaml in the folder you run epochix from to replace the
built-in cut-offs:
version: 1

grade_thresholds:
  classification:    # a task: applies to its accuracy
    "A+": 0.97       # a tighter standard for your domain
    A:    0.93
    B:    0.85
    C:    0.75
    D:    0.60
    F:    0.0
  val_f1:            # a metric: applies to it in any run
    A: 0.90
    B: 0.75
    C: 0.60
    F: 0.0
Each entry lists the lowest value that still earns a grade — or the highest,
for a metric where lower is better; the order of the numbers says which. A
task's entry applies to that task's main metric only, so thresholds written
for accuracy are never applied to an AUC. epochix check <log> shows which
file is in use and whether it applies to that log, and
.epochix.example.yaml
lists every entry with the built-in values.
The file is read by the command line, the server, the Python SDK and the VS Code extension, which looks for it from the workspace's first folder and re-grades the open run when the file changes.
Install from the VS Code Marketplace or search "Epochix" in the Extensions panel.
- Click the Epochix icon in the activity bar for the Runs view and ▶ Try a Demo Run
- Press
Ctrl+Alt+M(Cmd+Alt+Mon macOS) to open the dashboard panel - Works in standalone mode (no Python required) or sidecar mode with the Python package
Full docs at epochix.dev
git clone https://github.com/epochix-dev/epochix
cd epochix
uv run --extra dev pytest tests/unit tests/integration
Use uv run, as CI does: a bare pytest on a machine that also has epochix
installed tests that copy instead of your checkout.
Please read CONTRIBUTING.md before opening a pull request.
Apache 2.0 — © 2026 Epochix Team