Tutorials Data Loader
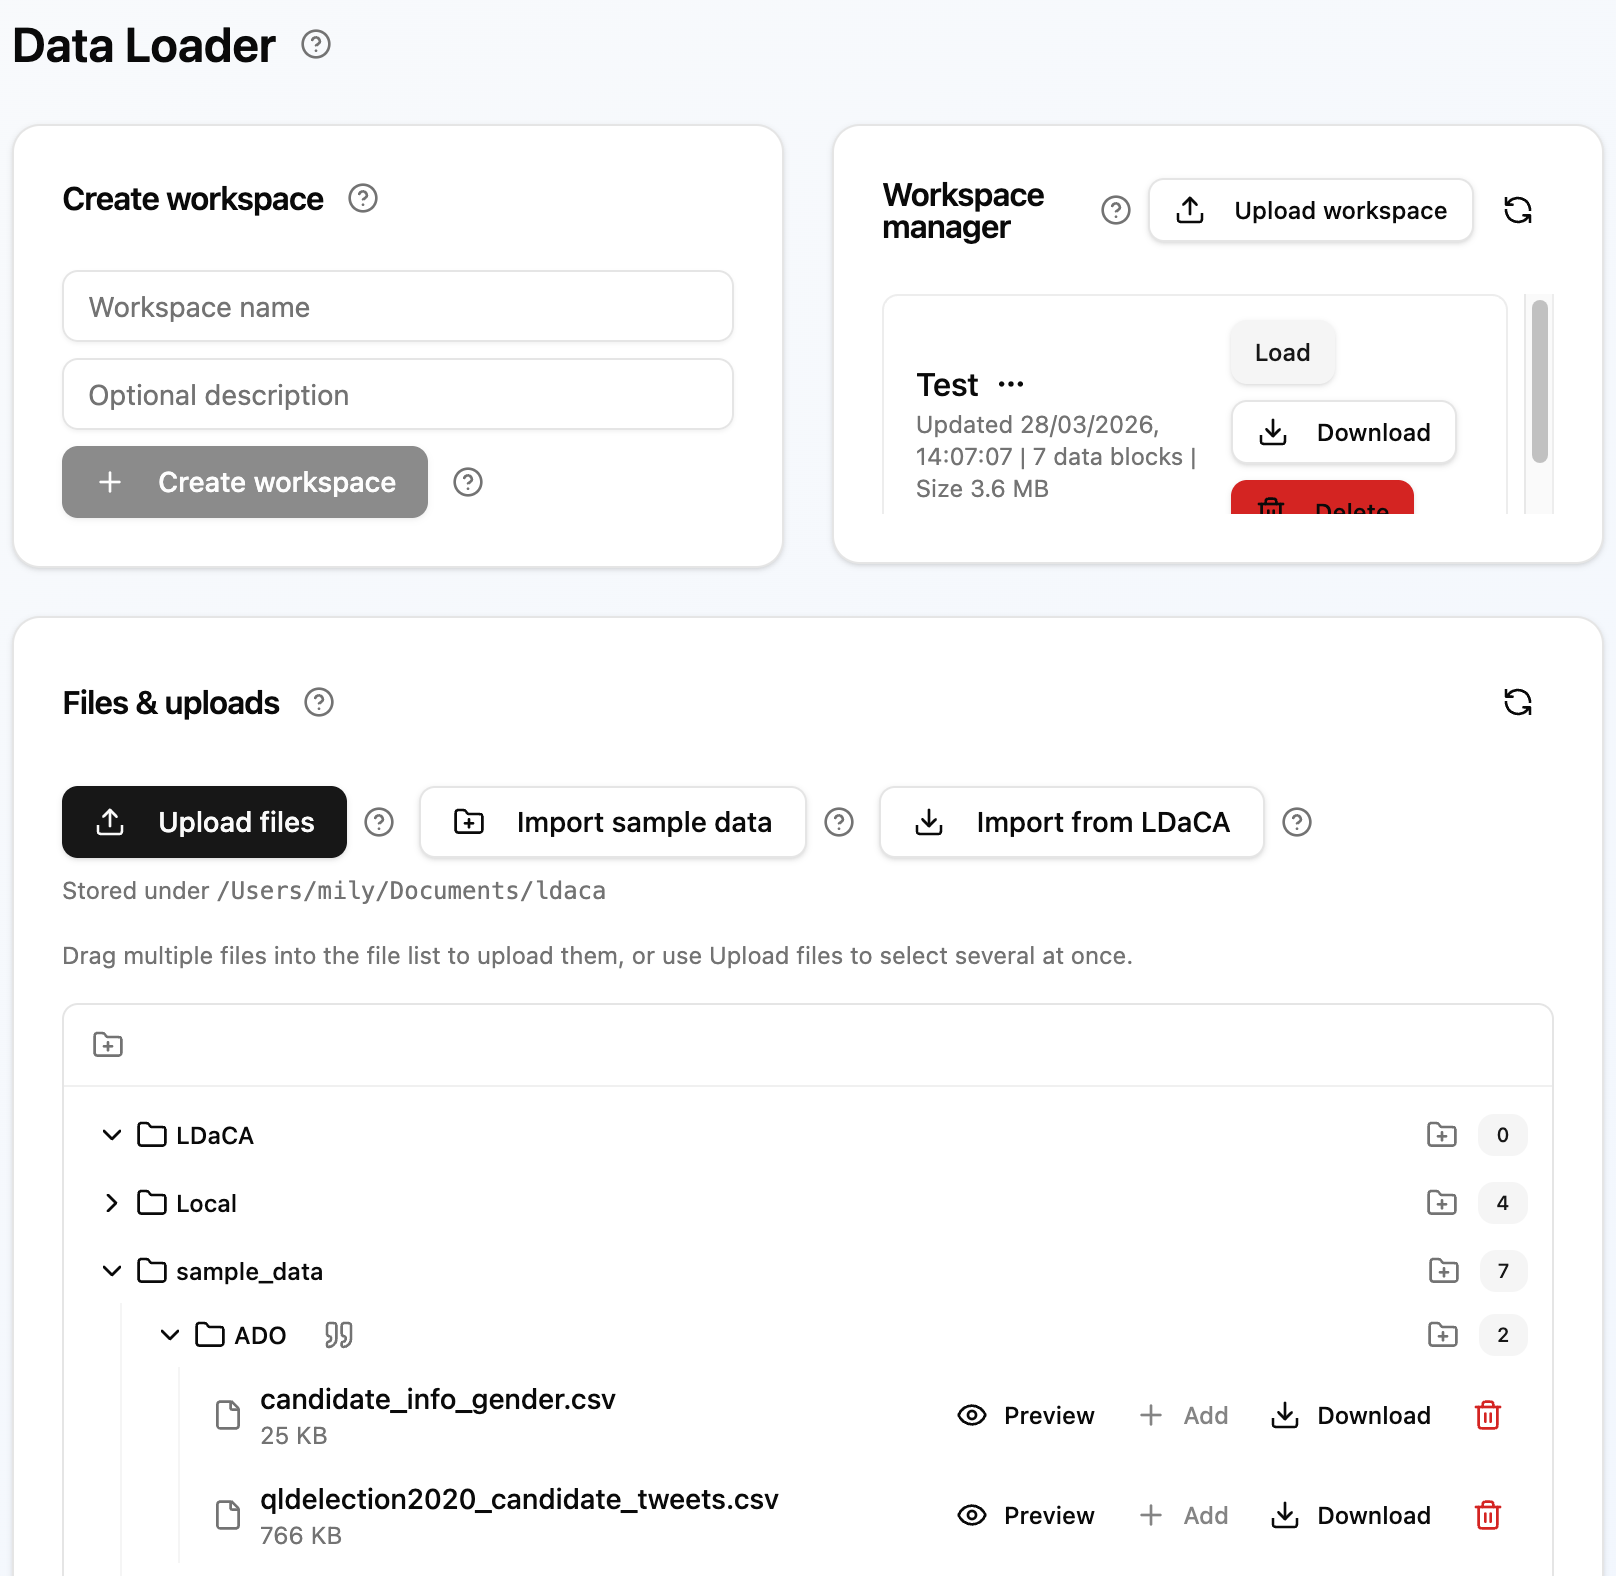
The Data Loader is the entry point of the application and must be configured before any analysis can be performed. It comprises three main panels: the active Project panel, the Project manager, and the files and uploads section.
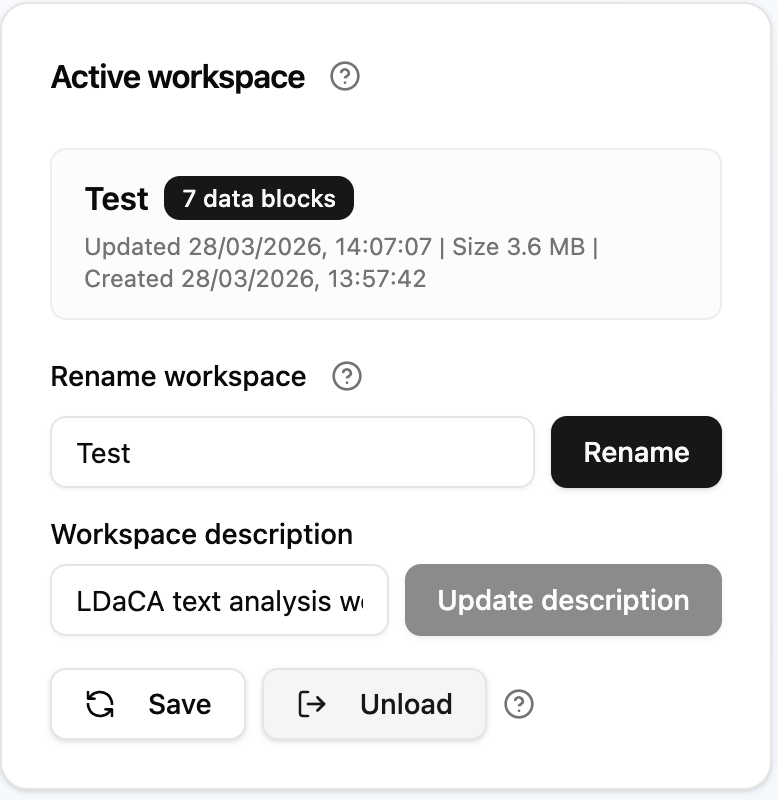
The active Project panel displays the currently open Project along with its associated Data Blocks. From here you can rename the Project or update its description; to close it, use Close in the Project manager. When no Project is open, this panel shows the option to create a new, empty Project. Your work is saved automatically.
- Verify the correct Project is open before starting any analysis.
- Create or rename a Project as needed.
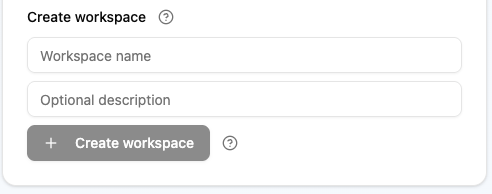
This field is visible only when no Project is currently active. Use it to specify a name for a new empty Project. Choose a descriptive name that reflects the project or dataset (e.g. the project title or dataset identifier). An optional description can also be provided at this stage.
Project names are not unique identifiers: the application allows multiple Projects to share the same name, each stored in a separate directory. Using identical names for different Projects is strongly discouraged, as it can cause confusion when managing or revisiting Projects.
Clicking this button creates a new Project with the specified name and optional description.
- The newly created Project becomes the active Project immediately.
- An active Project is required before files can be loaded and analysed.
Use this field to rename the currently active Project. Renaming is useful when the project scope evolves or when you want a more organised Project list. The Project description can also be updated from this field.
Click Close beside the open Project in the Project manager (the open Project is always listed first). Closing does not delete anything.
- Use this to switch between Projects, or open another Project directly with its Open button.
- A closed Project stays in the Project manager; click Open to continue working on it.
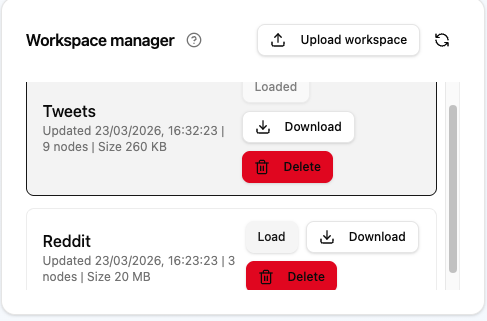
The Project manager lists all saved Projects, enabling you to switch between Projects and maintain an organised inventory.
- Click Open to make a Project the active Project. The open Project is listed first and highlighted, with a Close button.
- Click the star beside a Project's name to mark it as a favourite. Favourites are listed after the open Project, then the others by most recent change.
- Review the last-modified timestamp and Data Block count to confirm you are opening the intended Project.
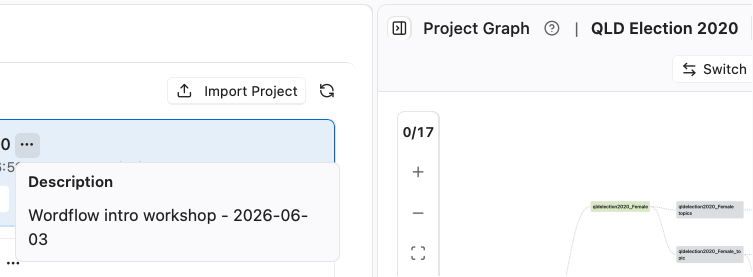
- Click Import Project to add a Project from a ZIP archive, such as one downloaded from another Wordflow.
- Click Download to export the entire Project as a ZIP archive. The archive contains Project metadata and Data Blocks together with compatible Tabs, completed or otherwise terminal Analyses, their durable Results and declared Artifacts, and the immutable query inputs needed to reopen them. Queued and running Analyses are omitted and their exported Tabs are empty. If the Project contains Analysis history written by a newer incompatible version, Wordflow preserves it in the saved Project but omits it and its dependent history from the portable ZIP; a warning reports the omitted Tab and Analysis counts during download or import. Data Blocks and retained query inputs are stored in Parquet format (a compressed, column-oriented binary format that preserves data types exactly and is far more compact than CSV). Because Parquet is a well-supported open standard, the downloaded files can also be opened directly in tools such as Python (pandas/polars), R, or DuckDB. The ZIP is saved to your browser's default downloads folder (or your system Downloads folder in the desktop app). You can import the ZIP (Import Project) into another instance of the application to resume your work there, for example when sharing a Project with a collaborator or moving between a local installation and a hosted server.
- Click Delete to permanently remove a Project that is no longer needed.
- Click the … beside a Project's name to read its description.
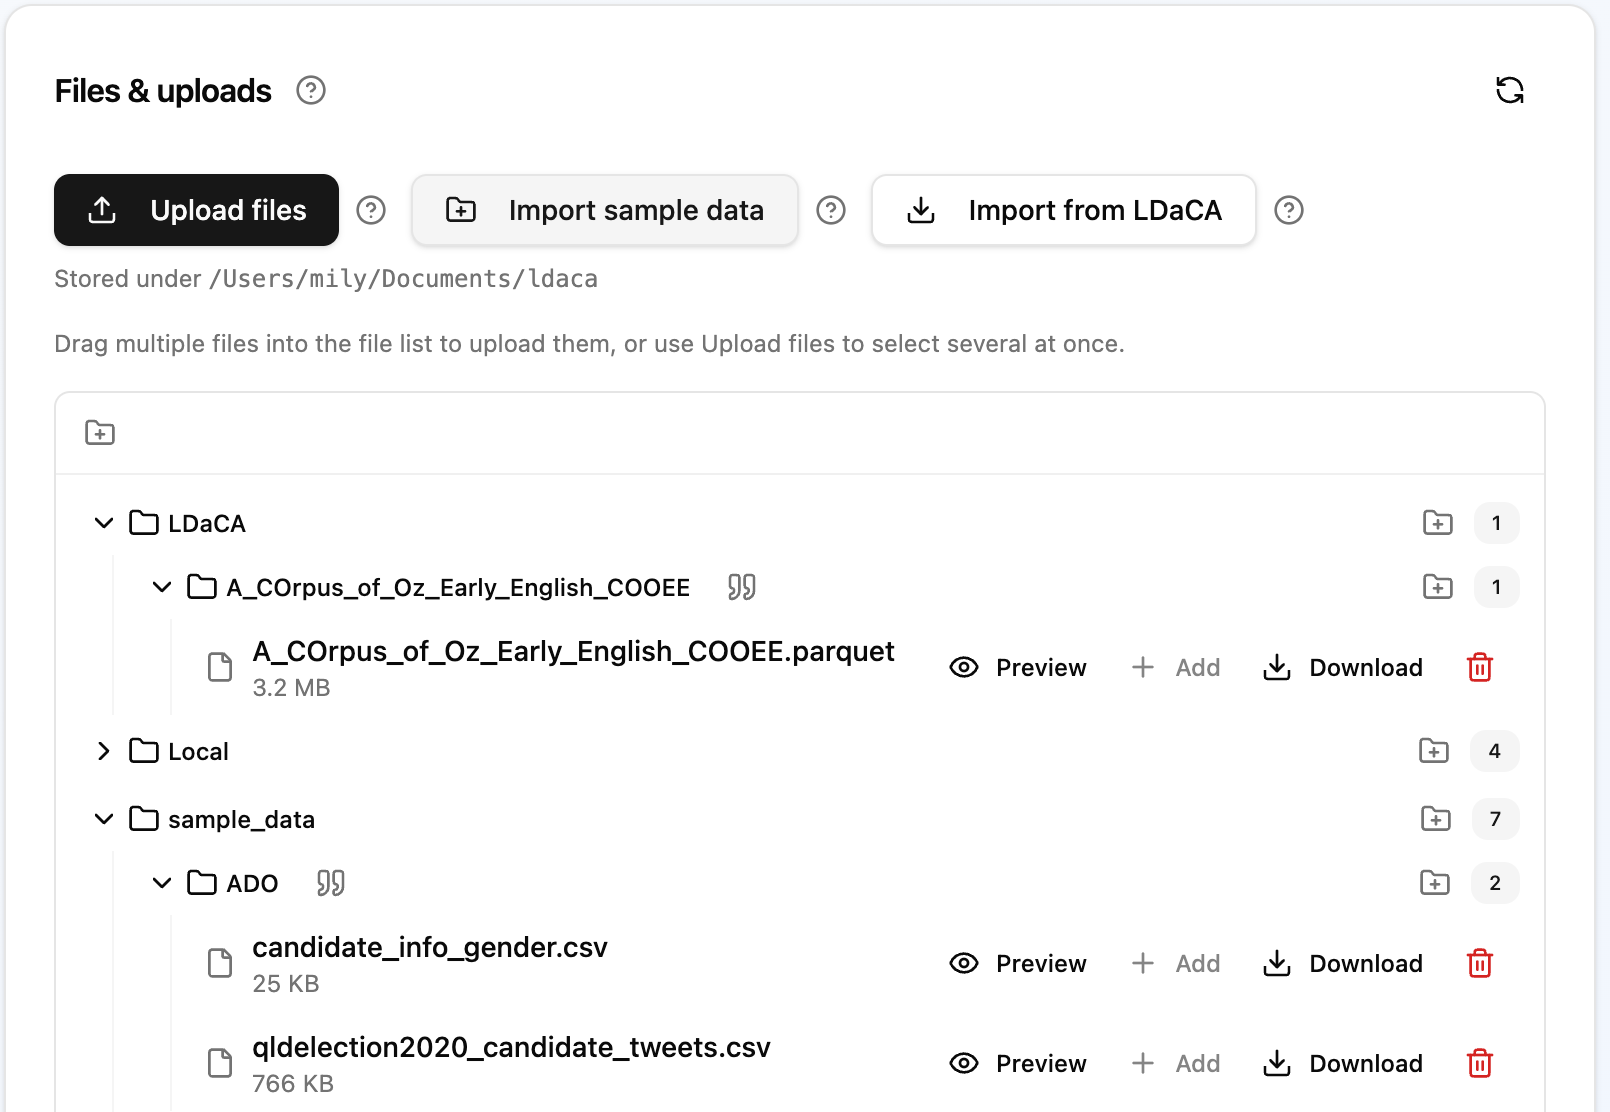
This panel is used to bring data into the application. It supports file and folder uploads, sample data imports, LDaCA imports, and adding files to the active Project as Data Blocks. You can also create subfolder structures, reorganise files via drag-and-drop, and remove files that are no longer needed.
Use Upload files to select one or more loose files. Use Upload folder to select one folder and preserve its root and nested structure. You can also drop loose files, folders, or a mixture of both onto the file list. If folder drop is not supported in the current browser, use Upload folder instead.
Before uploading, Wordflow checks the complete selection for invalid paths, duplicate destinations, and conflicts with existing User Files. If any path conflicts, nothing is uploaded and the dialog lists every path to resolve. Existing folders can be reused, but existing files are never overwritten.
Wordflow does not limit the size of a file. On a shared Wordflow server, your uploads count toward your storage space, and an upload larger than the space you have left is refused when it starts. Before uploading more than 50 MB on a shared server, Wordflow reminds you that the server is for trying Wordflow out: it is shared with other people and slow with a full corpus of that size. For large corpora, install the desktop app and work on your own computer; or choose Upload anyway and expect some tools to run slowly.
Each upload appears in the Tasks panel as L - Upload, with how much has
been sent, the speed, and the time left; for several files it also shows which
file is being sent. It keeps going while you work in other views. Stop (in
Tasks) or Cancel (in the Data Loader) ends it at once; a file that was only
partly sent is not kept, while files and folders already completed are. If an
upload makes no progress for a minute, it stops and says so: some networks,
such as campus networks, hold large uploads. Reloading or closing the page
ends an upload, so Wordflow asks first. A folder that is receiving an upload
cannot be deleted or moved until the upload finishes or you stop it. Dot-prefixed files and folders and Thumbs.db
files are skipped and reported in the completion message. Source folders that
contain no uploadable files are not created.
Supported loadable formats:
- Delimited tables:
.csv,.tsv - JSON:
.json,.jsonl,.ndjson - Columnar tables:
.parquet,.avro,.arrow,.ipc,.feather - Spreadsheets:
.xlsx,.xls,.xlsm,.xlsb,.ods(a Data Block from a spreadsheet is named after the file and sheet, such as hansard_Speeches) - UTF-8 text:
.txt,.text,.md,.rst,.log - UTF-8 document archives:
.zip - Folders of text documents (use the + button on a folder row)
The application stores other uploaded files, but the Data Loader hides them because they cannot become Data Blocks. Folders remain visible even when they contain no supported files.
Supported file types can be previewed before being added to the Project as a Data Block.
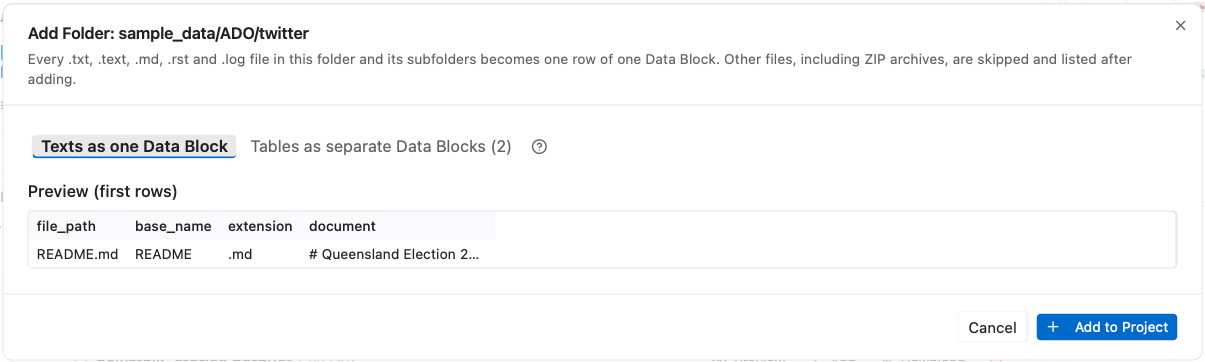
A ZIP archive or a whole folder becomes a document table with one row per text document. The table records each document's path (relative to the ZIP or folder), filename stem, extension, and complete text. The rules are the same for both:
- Only
.txt,.text,.md,.rstand.logfiles become rows, including those in subfolders. Other files, such as PDF, Word, spreadsheets, CSV metadata tables, and files with no extension, are skipped. - Text files must be UTF-8; other encodings are skipped.
- Hidden and system files (
.DS_Store,__MACOSX,._*,.git) are ignored, and links inside a folder are not followed. - After adding, a message lists the skipped files by extension, for example 50 files skipped while loading: pdf - 30, xlsx - 10, docx - 5, csv - 4, exe - 1.
- A folder's text files together must fit within the single-file size limit.
When you add a folder (its + button) or a ZIP archive (Add), choose how to load it:
-
Texts as one Data Block (default) follows the document rules above.
-
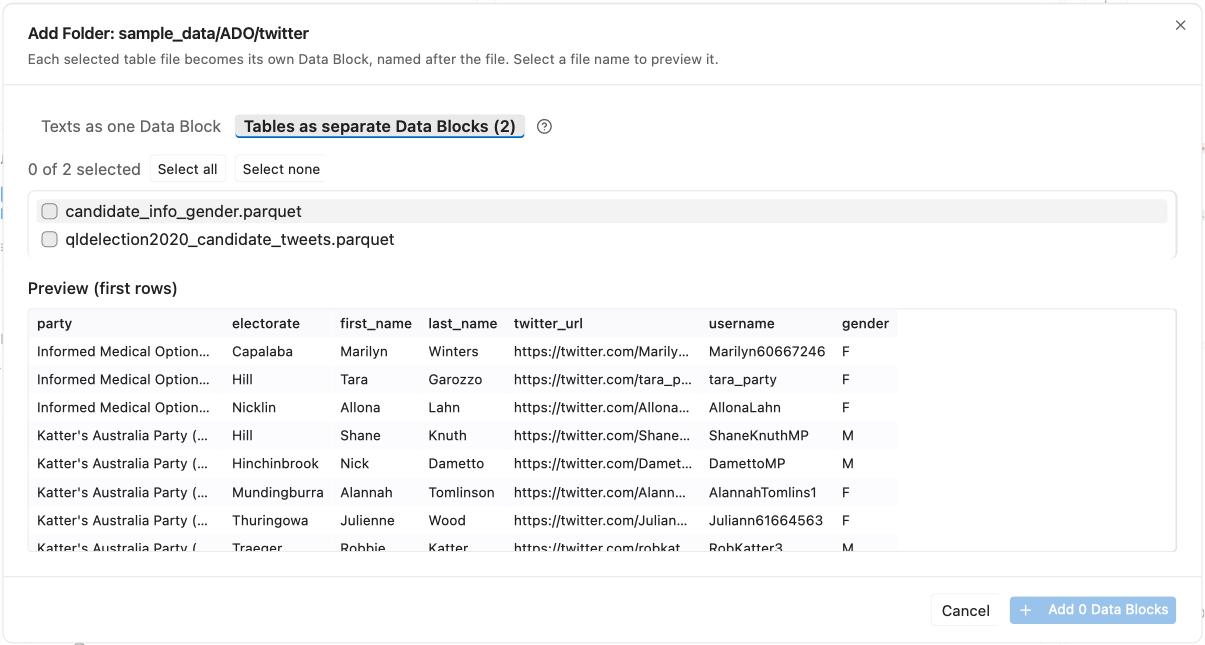
Tables as separate Data Blocks lists every table file in the folder and its subfolders, or inside the ZIP (CSV, TSV, JSON/JSONL, Parquet, Avro, Arrow/IPC, and spreadsheets, which use their first sheet). Tick the files you want, or use Select all or Select none, and select a file name to preview it. Each ticked file becomes its own Data Block named after the file (a spreadsheet in a folder also adds its sheet name). No file is ticked at first, and the button shows how many Data Blocks will be added.
A ZIP inside a folder, or inside another ZIP, is never opened: it is skipped (and listed as skipped in Texts mode). Add the ZIP on its own to load its contents.
To use a metadata table that sits beside the texts, add the texts in Texts
mode and the CSV in Tables mode (from the same folder or ZIP), then join them
on base_name.
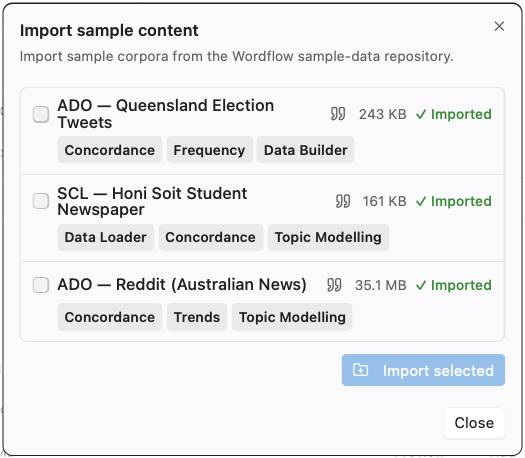
Use this option to import curated sample datasets from the Wordflow sample-data repository. These are intended for first-time users to explore the app's capabilities.
Tick one or more datasets and click Import selected. Each dataset shows its size and the tools it suits, a quote icon for its citation, and ✓ Imported once it is in your files. Imported datasets appear under the sample_data folder.
All sample data is publicly available and may be freely tested or removed. If sample data is used in a research output, please cite  the dataset appropriately.
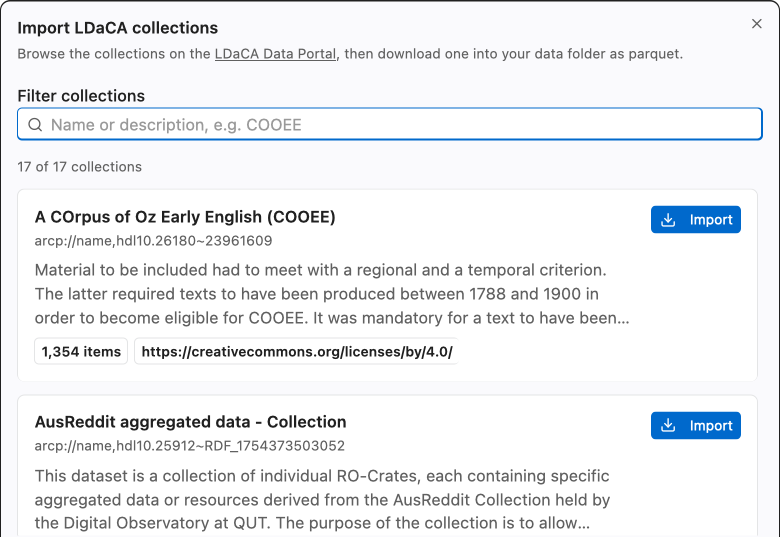
Use this option to import a collection directly from the Language Data Commons of Australia (LDaCA Data Portal).
- Click Import LDaCA collections. The dialog lists every top-level collection on the portal, with its number of items and its licence. Each title links to its portal page.
- Type in Filter collections to narrow the list by name or description.
- Click Import on a collection to bring in its texts.
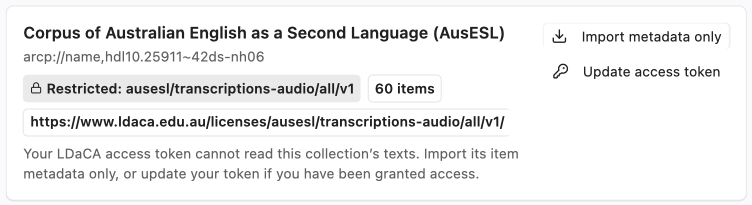
Some collections are access-controlled. A collection your LDaCA access token cannot read is marked Restricted, with the licence you need to apply for. For these you can:
- Import metadata only: one row per item (for example each interview), with its descriptive metadata and speaker details such as gender, birth date, and location, but no text. This uses the metadata the portal publishes for every item. A collection that publishes no item metadata (marked Collection description only) offers Import collection metadata instead, which gives one row describing the collection.
- Update access token: opens Settings, at Portal, where you enter or change your token (you can get one by signing in to the LDaCA Data Portal). When you save it, the list checks access again, so collections you have been granted access to become available to import. Close Settings to return to the list.
Imports run in the background and may take from 30 seconds to a few minutes, depending on collection size and network speed. The imported collection appears in the files list under the LDaCA folder as a Parquet file (with "(metadata)" in its name for a metadata-only import). If files do not appear, click the refresh button in the top-right corner of the panel.

Once a file is uploaded or imported, its row offers the following actions:
-
Preview the file contents before adding it to the Project.
-
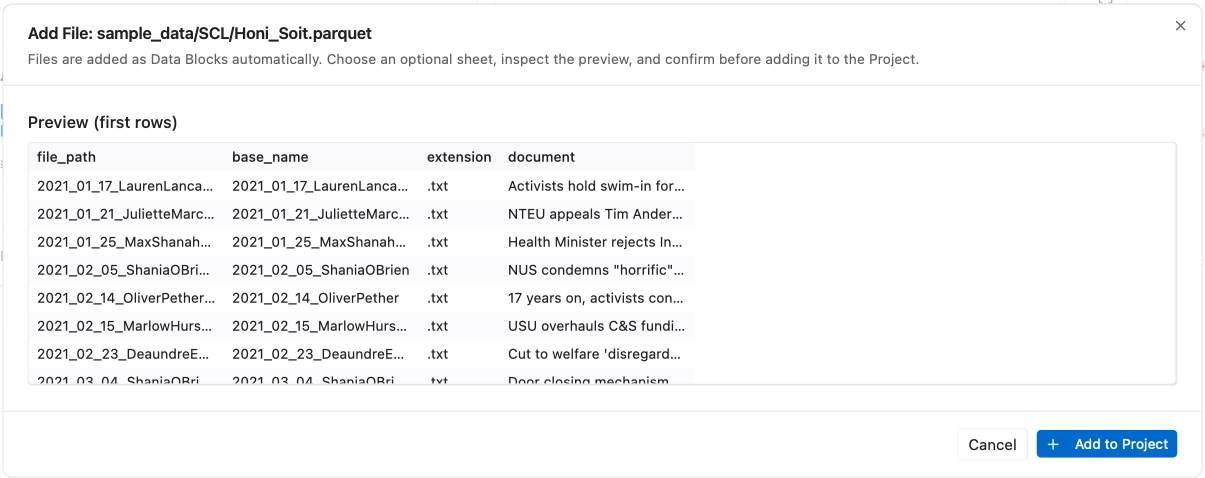
Add opens the add panel, where you can check the preview (and choose a sheet for a spreadsheet) and click Add to Project to load the file as a Data Block in the active Project. A Project must be open first.
-
Download the original file to your local machine.
-
Delete (the trash icon) removes the file from the application.
A folder row has its own + button to add the folder's files as Data Blocks (see Upload files and folders).
The files panel supports folder management and drag-and-drop reorganisation so you can keep uploads tidy across Projects.
Creating folders
Click the folder icon with a + (Add folder inside) next to any existing folder to create a subfolder inside it, or use the equivalent button at the root level to create a top-level folder. A dialog will prompt you for a name. Folders can be nested to any depth.
Deleting files and folders
Click the trash icon next to a file or folder to request its permanent removal. A confirmation dialog identifies the selected item before deletion. Deleting a folder also deletes everything inside it.
Moving files and folders by drag-and-drop
Drag any file or folder row and drop it onto a target folder (or onto any file inside a target folder) to move it there; drop it on empty space in the panel to move it to the top level. A folder moves with everything inside it. Valid drop targets are highlighted as you drag. Nothing is moved into the folder it already belongs to, a folder cannot be moved into itself or one of its subfolders, and a move is refused when the target already contains an item with the same name.
Selecting several items
Tick the checkbox beside a file or folder (it appears when you hover, and on every row once something is selected) to select it. Shift-click selects everything between two rows, and Ctrl-click (Cmd-click on a Mac) adds or removes one row. Select all at root at the top of the panel selects every top-level item, and each open folder shows Select all in folder while you are selecting.
With items selected, the bar at the top shows how many are selected and offers:
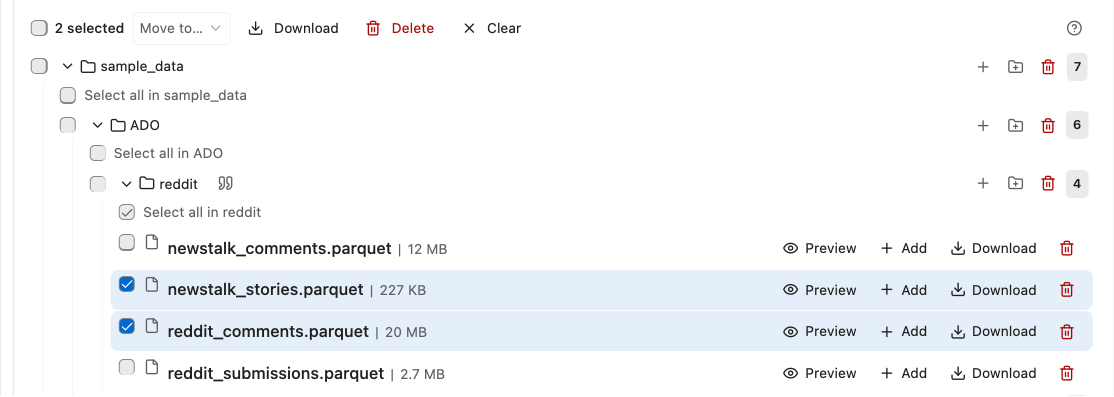
- Move to…: move the whole selection into a folder or the top level. You can also drag any selected row to move them all.
-
Download: download the selection as one ZIP. Folders keep their structure, and paths start from the folder that contains the selection, so selecting
speechesandone.csvgivesspeeches/…andone.csv. - Delete: delete the selection after a confirmation that counts the files and folders affected. Folders are deleted with everything inside them, and deletion cannot be undone.
- Clear: deselect everything (or press Esc).
Press Delete or Backspace to open the delete confirmation for the current selection. To clear out many files uploaded at the top level, choose Select all at root, then Delete.
Some folders (particularly those created by the LDaCA importer) display a small quote icon () next to the folder name. This icon indicates that the folder contains a README.md file with citation, licensing, or copyright information provided by the dataset's author.
Click the icon (View README) to open the folder's README. The contents are rendered as formatted text and may include:
- A required citation or acknowledgement for the dataset.
- Licence terms (e.g. Creative Commons, restricted use).
- Copyright or access conditions.
If this icon appears on a folder you intend to use in research or publication, review the notice carefully and follow the stated requirements before sharing or publishing your results.
| Symptom | Likely cause | What to try |
|---|---|---|
| File fails to load | Unsupported format or encoding | Check that the file is UTF-8 encoded and uses a supported format |
| CSV preview shows all data in one column | Wrong delimiter | Re-export with a comma delimiter, or contact the developer team |
| LDaCA import does not appear | Import still in progress | Wait a moment and click the refresh button |
| Project not visible in the manager | The data folder changed | Check the data folder under Settings → Project → Data folder |
| Duplicate Project names | Project names do not have to be unique | Open each, review its contents, and rename them to distinct names |
| Some files were not added from a folder or ZIP | They are not UTF-8 text files, or they are tables | Read the skipped-files message; add tables in Tables as separate Data Blocks mode |
| Setting | Default | Notes |
|---|---|---|
| Data folder | The usual folder for your operating system | Opened automatically on first start; change it under Settings → Project → Data folder |
| Folder or ZIP mode | Texts as one Data Block | Switch to Tables as separate Data Blocks to add each table file |
- Create a Project named Practice Corpus.
- Upload a CSV file and preview its contents.
- Add the file to the Project as a Data Block.
- Rename the Project to Practice Corpus v1.
- Close the Project and open it again from the Project manager.